Introduction
Securing an electric scooter against theft is essential for anyone who parks in public spaces or leaves the vehicle unattended. This guide explains how to install a wheel immobilizer, a simple yet highly effective deterrent that prevents a thief from rolling the scooter away. The reader will learn the tools required, the exact installation procedure, and best‑practice tips to ensure long‑term reliability. By following the steps, one can protect a valuable investment without the need for professional assistance.
What You’ll Need
- Honszex Scooter Lock & Holder Set – high‑tensile alloy chain, waterproof EVA bag, and phone holder (price: $53.99, rating: 4.4/5 from 3,862 reviews).
- Sportneer U‑Lock with Cable – 17 mm shackle, 5 ft steel cable, and mounting bracket (rating: 4.6/5 from 4,903 reviews).
- Allen key set (typically included with the scooter).
- Soft cloth for cleaning the frame and wheel.
- Protective gloves to avoid hand injuries while handling the chain.
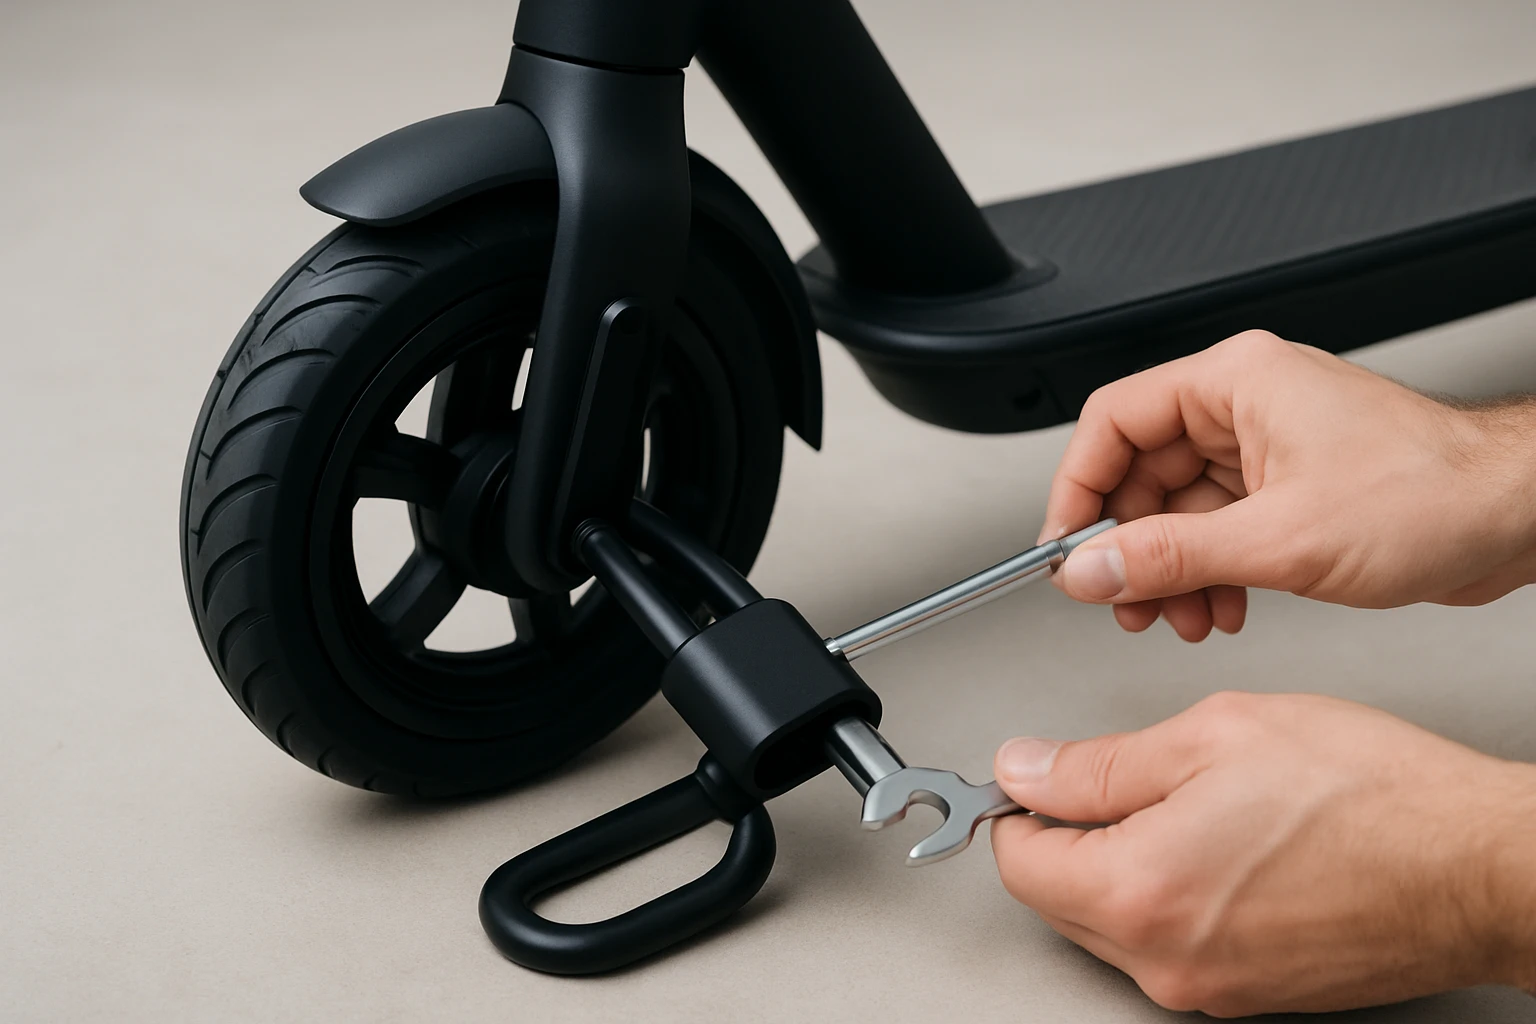
Step 1: Prepare the Scooter
Begin by positioning the scooter on a flat surface and turning off the power switch. Use a soft cloth to remove dust and debris from the wheel hub and the area where the lock will be attached. This cleaning step ensures that the lock components make full contact with the metal, maximizing friction and preventing slippage. Verify that the scooter’s brake is engaged to keep the wheel stationary during the installation.
At this stage, the Honszex Scooter Lock & Holder Set becomes useful because its chain length of 92 cm provides ample reach to encircle the wheel and the scooter frame simultaneously. The high‑tensile alloy material resists deformation, which is critical when the lock is tightened around the wheel axle.
Step 2: Position the Chain Lock Around the Wheel
Open the handcuff‑style chain lock and thread the 60 cm chain segment through the rear axle and around the scooter’s main frame tube. Ensure that the chain passes close to the brake disc, as this creates additional resistance against wheel rotation. Pull the chain until the lock’s body rests snugly against the frame, leaving no slack that a thief could exploit.
The chain is wrapped in high‑quality fabric, which reduces noise and prevents scratches on the scooter’s paintwork. The lock’s key mechanism is protected by a waterproof EVA storage bag, allowing the user to keep the key dry during rainy conditions.
Secure the lock by turning the key until the locking pins engage fully. Test the lock by attempting to move the wheel gently; the wheel should remain immobile. If any movement is detected, tighten the chain slightly more before re‑locking.
Step 3: Reinforce Security with a U‑Lock and Cable
While the chain lock provides primary immobilization, adding a secondary barrier significantly increases theft resistance. Take the Sportneer U‑Lock with Cable and attach its 5 ft steel cable to a sturdy, immovable object such as a bike rack, fence post, or a heavy pole.
Loop the cable around the scooter’s front fork and the rear axle, then connect the cable to the U‑lock’s shackle. The 17 mm shackle can withstand hydraulic shear forces up to 12 tons, making it extremely difficult for a thief to cut or pry open. The silicone coating on the lock body protects the scooter’s finish from scratches and repels water and dust.
Use the included mounting bracket to secure the U‑lock to the scooter’s frame if a permanent attachment is desired. This bracket accommodates tube diameters between 15 mm and 28 mm, which covers most electric scooter handlebars.
Step 4: Attach the Phone Holder (Optional)
If the rider wishes to keep a navigation device or a ride‑tracking phone within easy reach, the phone holder component of the Honszex set can be installed after the lock is in place. Slide the holder onto the handlebar, adjusting the width to fit a 4.7‑6.7 inch phone. The internal silicone pads absorb shock and prevent slippage during rides.
The 360° adjustable bracket permits the rider to position the screen at the most comfortable viewing angle, reducing the need to handle the phone while riding. This feature enhances safety without compromising the security of the lock system.
Step 5: Verify the Installation
Perform a final inspection by gently pushing the scooter forward and backward. The wheel should remain stationary, and the U‑lock and cable should show no signs of looseness. Check that the key is stored in the waterproof EVA bag and that the bag is attached to the scooter’s frame for quick access.
It is advisable to test the lock in different weather conditions. The silicone coating on the U‑lock and the waterproof bag on the chain lock protect against rain, ensuring that the locking mechanisms continue to function reliably.
Tips & Pro Tips
- Rotate the lock’s key position periodically to avoid wear on a single key slot.
- Apply a thin layer of silicone spray to the chain’s fabric wrap to enhance water resistance.
- When parking in high‑traffic areas, position the scooter so that the lock faces the street, making tampering more visible.
- Consider using a secondary cable lock in addition to the U‑lock for especially valuable scooters.
- Store a spare key in a secure, separate location to avoid being locked out.
Troubleshooting
Problem: The wheel still rotates after the chain lock is engaged.
Solution: Ensure the chain passes directly over the axle and that the lock body is pressed tightly against the frame. If necessary, reposition the chain to a lower point on the axle for greater leverage.
Problem: The U‑lock shackle does not close fully.
Solution: Verify that the cable is not twisted and that the shackle aligns with the lock’s keyhole. Use the provided Allen key to adjust the bracket angle if needed.
Conclusion
By following this step‑by‑step guide, one can install a robust wheel immobilizer on an electric scooter using the Honszex Scooter Lock & Holder Set and the Sportneer U‑Lock with Cable. The combination of a high‑tensile chain lock and a hardened steel U‑lock creates layered security that deters even determined thieves. Regular maintenance and the pro tips provided will extend the lifespan of the locking system, ensuring that the scooter remains safe wherever it is parked.
Products Mentioned in This Guide
Frequently Asked Questions
What tools are required to install a wheel immobilizer on an electric scooter?
You need an Allen key set (usually supplied with the scooter), a soft cloth for cleaning, protective gloves, and the immobilizer kit itself (e.g., Honszex Scooter Lock & Holder Set).
Can I install a wheel immobilizer myself without professional help?
Yes, the installation is DIY‑friendly and can be completed in 10–15 minutes by following the guide’s step‑by‑step instructions.
Is a wheel immobilizer compatible with all electric scooter models?
Most immobilizers fit standard scooter frames and wheels; check the kit’s specifications for clearance and mounting hole requirements before purchasing.
How do I ensure the wheel immobilizer remains reliable over time?
Regularly clean the frame, tighten the lock bolts after each ride, and store the device in a dry place to prevent rust and wear.
What is the best way to remove a wheel immobilizer if I need to service my scooter?
Loosen the Allen‑key bolts, slide the lock off the wheel, and keep the key or combination handy for re‑installation.