How to Install a Speed Limiter on a Folding E‑Scooter for Kids: Step‑by‑Step Safety Guide
Introduction
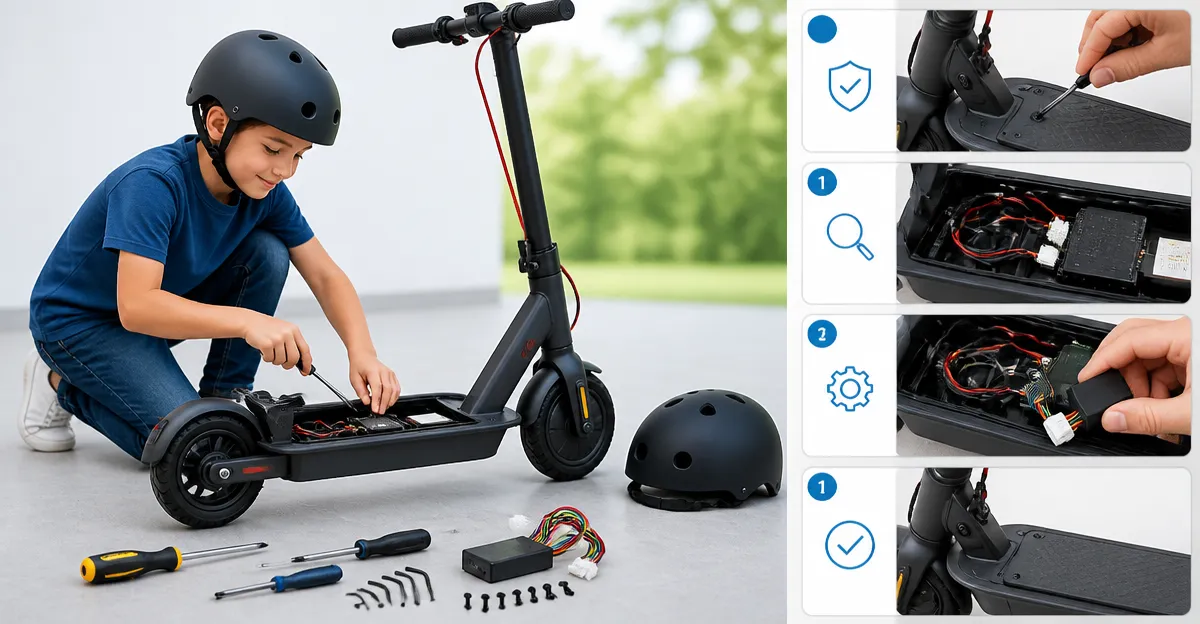
Parents who provide a folding e‑scooter for their children often worry about excessive speed on smooth pavement or crowded sidewalks. This guide explains how to install a speed limiter that restricts maximum velocity while preserving the scooter’s fun factor. Readers will learn the necessary tools, the precise installation process, and how to verify correct operation before allowing a child to ride. By following each step, one can enhance safety without compromising the scooter’s portability.
What You’ll Need
- Phillips screwdriver set (standard size for scooter screws)
- Wire stripper / cutter (optional, for clean connections)
- Multimeter (to verify voltage after installation)
- One of the recommended speed‑limiting devices listed below
All recommended devices are compatible with most 12 V–72 V folding e‑scooters and include detailed installation instructions.
Step 1 – Assess the Existing Throttle System
Before any modification, disconnect the scooter battery to prevent accidental short circuits. Locate the throttle assembly, which is typically mounted on the handlebar and connected to the controller via a small plug. Examine the wiring harness for a three‑pin or six‑pin connector; this determines which speed limiter will integrate most smoothly.
If the connector is a three‑pin type, the L‑faster Throttle Speed Knob is an ideal choice because it is designed for simple plug‑and‑play installation between the controller and throttle. It offers an adjustable speed limiter and is praised for its ease of installation.
For scooters that already feature a wiring harness, the AlveyTech Speed Pot provides a ready‑made harness that matches many Go‑Go and Pride mobility models. Its integrated harness reduces the need for separate connectors.
Step 2 – Choose the Appropriate Speed Limiter
Consider the voltage range of the scooter’s battery. If the scooter operates between 24 V and 48 V, any of the listed devices will function, but the CWTD Twist Throttle Speed Knob stands out for its universal 12 V–72 V compatibility and ten‑step adjustment, allowing precise control over the maximum speed.
For riders who need a dual‑mode solution that can switch between low‑speed (ECO) and high‑speed (TURBO) modes, the Jfentrwa Dual Switch Speed Controller offers a built‑in speed‑limiting module and a single/dual motor switch, which is useful for scooters equipped with dual‑motor drive systems.
When budget is a primary concern, the ZXTDR Scooter Speed Limiter Knob provides a low‑cost alternative with a simple two‑plug, six‑wire design suitable for basic single‑motor scooters.
Step 3 – Prepare the Throttle Wiring
Using the screwdriver, remove the throttle housing to expose the connector. Gently pull the connector apart; most scooters use a snap‑fit design that releases with modest pressure. If the wires are bundled, use a wire stripper to expose about 5 mm of copper on each conductor, ensuring a clean contact surface.
For the L‑faster Throttle Speed Knob, insert the three‑wire plug between the controller and throttle. The device’s adjustable potentiometer will sit in the middle, allowing you to set the desired voltage limit.
When installing the CWTD Twist Throttle Speed Knob, connect the six‑wire harness to the corresponding pins on the controller; the included 15.4‑inch wire length gives ample slack for routing along the handlebar.
Step 4 – Configure the Speed Limiter
After the device is physically connected, power the scooter briefly to test the adjustment range. For the L‑faster knob, rotate the dial clockwise to increase the output voltage; each click corresponds to a small increment in speed. Set the dial so that the scooter reaches a maximum of 8–10 km/h, which is a safe speed for most children.
The CWTD knob offers a three‑gear selector plus a ten‑step rotary control. Begin in the lowest gear, then adjust the rotary knob until the desired top speed is achieved. Use a multimeter to verify that the voltage at the throttle does not exceed the manufacturer‑specified limit for the child’s age group.
The AlveyTech Speed Pot includes a calibration screw; turn it clockwise to reduce the maximum speed and counter‑clockwise to increase it. Follow the included instruction sheet to achieve a consistent limit across multiple rides.
Step 5 – Secure All Components
Once the speed limit is set, re‑attach the throttle housing using the original screws. Ensure that no loose wires are trapped under the housing, as this could cause intermittent connections. For devices with a plug‑and‑play design, such as the ZXTDR knob, simply snap the connectors back into place and tighten any retaining screws.
Apply a small amount of electrical tape around exposed conductors for added protection against moisture, especially if the scooter will be used in damp conditions. Verify that the handlebar remains firmly attached and that the throttle moves smoothly without binding.
Step 6 – Perform a Final Safety Test
Reconnect the battery and place the scooter on a flat, open surface. Engage the throttle gently and observe the response. The scooter should accelerate to the predetermined maximum speed and then stop increasing, regardless of further throttle input.
Ask the child to ride under supervision while you monitor the speed using a handheld GPS speedometer or a smartphone app. Confirm that the limiter remains effective throughout the ride and that the scooter brakes respond promptly.
If the scooter exceeds the set speed, double‑check the dial position on the speed limiter and repeat the voltage measurement. Adjust as necessary until the desired limit is consistently enforced.
Tips & Pro Tips
- Always perform the installation with the battery disconnected to avoid accidental short circuits.
- Mark the dial position on the speed limiter with a permanent marker; this provides a visual reference for future adjustments.
- For scooters used in rainy climates, consider applying a silicone sealant around the connector housing to improve water resistance.
- When using the Jfentrwa Dual Switch, select the ECO mode for everyday riding and switch to TURBO only in controlled environments.
- Keep a spare set of screws and a small zip‑lock bag of wiring connectors; replacements are inexpensive and prevent downtime.
Troubleshooting
| Problem | Possible Cause | Solution |
|---|---|---|
| Scooter does not accelerate | Connector not fully seated | Power off, disconnect battery, and reseat all plugs until they click firmly. |
| Speed limiter has no effect | Dial set to maximum | Rotate the knob to a lower setting; verify with a multimeter. |
| Intermittent throttle response | Loose wire or damaged strip | Inspect wires for fraying; re‑strip and reconnect if necessary. |
| Excessive heat on controller | Incompatible voltage range | Confirm that the chosen speed limiter supports the scooter’s battery voltage; replace with a compatible model. |
Conclusion
Installing a speed limiter on a folding e‑scooter for children is a straightforward process that significantly enhances safety. By selecting a compatible device, following the step‑by‑step wiring instructions, and verifying the speed limit with proper testing, one can provide a controlled riding experience that encourages confidence and enjoyment. Regularly inspect the installation and adjust the limiter as the child grows or as riding conditions change.
Products Mentioned in This Guide
Frequently Asked Questions
How do I install a speed limiter on a folding e‑scooter for kids?
Disconnect the battery, locate the throttle wiring, insert the limiter according to its wiring diagram, secure it with screws, then reconnect the battery and test.
What tools are required for installing a speed limiter?
A Phillips screwdriver set, optional wire stripper/cutter, and a multimeter to verify voltage after installation.
Can I use any speed‑limiting device on my scooter?
Choose a limiter rated for the scooter’s voltage range (12 V–72 V) and compatible with its throttle system; generic devices may not fit.
How do I test that the speed limiter is working correctly?
After installation, power the scooter, use a multimeter to check voltage at the throttle, then ride briefly to confirm the top speed matches the limiter’s rating.
Will adding a speed limiter affect the scooter’s folding mechanism or battery life?
A properly installed limiter does not interfere with folding parts and has minimal impact on battery consumption, as it only caps motor output.