Introduction
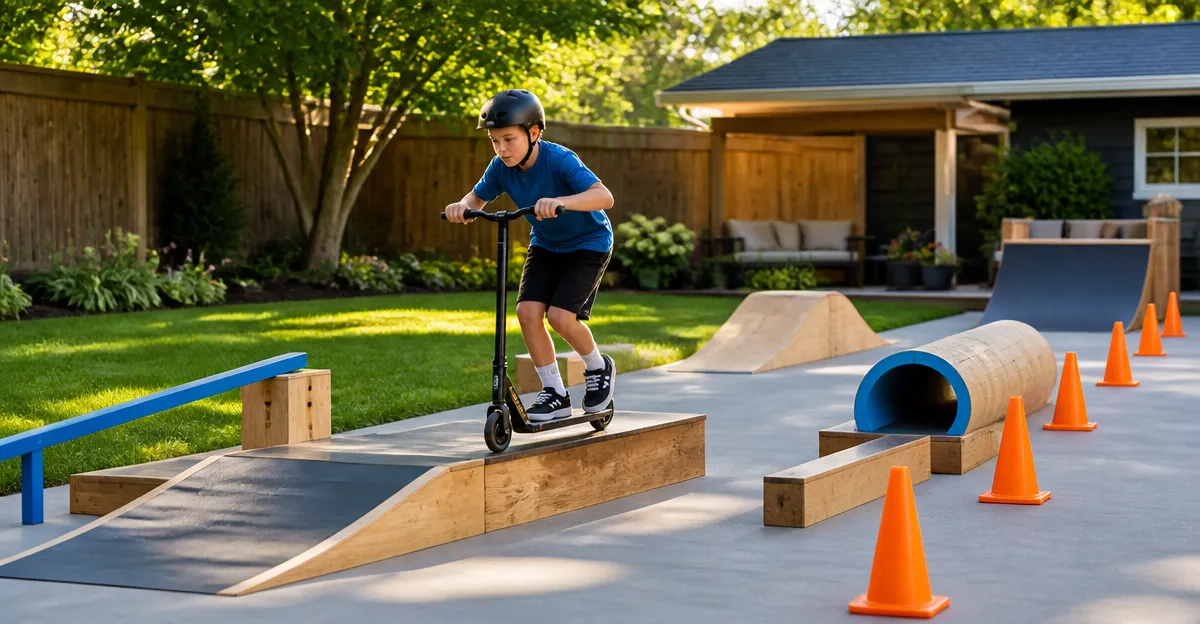
Parents who wish to encourage outdoor activity often seek a structured environment where children can practice scooter tricks safely. This guide explains how to design and assemble a backyard scooter skill course using affordable, durable equipment. Readers will learn how to plan the layout, select appropriate ramps, and apply safety measures that protect young riders while fostering confidence. By following the step‑by‑step instructions, one can transform a modest yard into a miniature skate park that grows with a child’s abilities.
What You’ll Need
- Measuring tape, level, and marking paint for layout planning.
- Ground‑level anchoring stakes or sandbags for ramp stability.
- Safety gear: helmets, knee pads, elbow pads, and gloves.
- Ramp modules (recommended products are listed below).
- Basic tools: screwdriver, wrench, and a rubber mallet.
The following products have been selected for their durability, ease of assembly, and positive customer feedback. Each link opens in a new tab.
- Andjoor Kids Jumping Ramp (Black) – $59.99, 4.6/5 rating (599 reviews).
- Yes4All Skateboard Ramp – $79.15, 4.4/5 rating (355 reviews).
- PLATPORTS Skateboard Kicker Ramp – $164.99, 4.4/5 rating (117 reviews).
- Andjoor Kids Jumping Ramp (34.37 in) – $89.99, 4.6/5 rating (599 reviews).
Step 1: Planning the Layout
Begin by measuring the available flat surface. Use a measuring tape to mark a rectangular zone that accommodates at least two ramps and a safe landing area. Sketch the design on paper, indicating the start line, ramp positions, and buffer zones. A typical beginner layout includes a primary launch ramp, a secondary landing ramp, and a clear runoff of at least three meters. Planning ensures that the course fits within property boundaries and respects neighbor sightlines.
Step 2: Installing the Primary Launch Ramp
The primary launch ramp should be sturdy, wide, and capable of supporting multiple riders. The Andjoor Kids Jumping Ramp (Black) offers a 23.62‑inch width and a weight capacity equivalent to three adults, making it ideal for a family setting. Its slip‑resistant finish and non‑slip rubber feet prevent movement during use, which reduces the risk of accidental falls.
- Place the ramp on the marked start zone.
- Align the rubber feet with the ground and press firmly to engage the non‑slip surface.
- Secure the ramp with anchoring stakes driven into the soil at each corner, or use sandbags if the ground is hard.
- Test stability by applying gentle pressure on the ramp surface; adjust stakes until no wobble is detected.
Because the ramp assembles in under one minute without tools, one can reposition it for future course modifications. The generous width allows children to approach from various angles, encouraging creative line choices.
Step 3: Adding a Secondary Landing Ramp
After the launch, a landing ramp provides a smooth transition back to the ground, reducing impact forces. The Yes4All Skateboard Ramp is a single‑piece design that measures 44" × 18" × 6.25" and supports up to 220 lb. Its textured surface enhances friction, which is essential for controlled landings.
- Place the Yes4All ramp at the designated landing zone, ensuring the slope faces the direction of travel.
- Insert the eight TPE footings beneath the ramp to prevent sliding.
- Use a level to confirm that the ramp surface is parallel to the ground, adjusting footings as needed.
- Connect the ramp to the launch area with a short flat segment of plywood or a portable platform for seamless flow.
This ramp’s beginner‑friendly height allows younger riders to practice jumps without excessive airtime, while the solid construction endures repeated use.
Step 4: Expanding the Course with Modular Configurations
For families seeking variety, the PLATPORTS Skateboard Kicker Ramp provides a 10‑piece system that can be arranged into at least 18 different configurations. The set includes four slopes, a large tabletop connector, and galvanized steel supports that ensure long‑term stability.
To create a “mini‑mountain” configuration:
- Connect two slopes to the tabletop, forming a central launch platform.
- Attach the remaining two slopes on opposite sides to create a descending path.
- Secure each joint with the provided mounting holes and tighten with screws (included).
- Place rubber leg pads beneath the tabletop to increase traction on concrete or asphalt.
This modular approach allows one to alternate between straight jumps, tabletop tricks, and ramp‑to‑ramp transitions, keeping the experience fresh as the child’s skill level advances. The steel tubes also support heavier bikes or BMX frames, extending the course’s usability beyond scooters.
Step 5: Incorporating an Advanced Ramp for Growth
When a child demonstrates confidence on the basic ramps, the larger Andjoor Kids Jumping Ramp (34.37 in) offers increased height and length, enabling higher airs and more complex tricks. Its identical width and slip‑resistant features maintain safety while delivering a new challenge.
- Position the advanced ramp at the far end of the course, ensuring a clear run‑up area of at least four meters.
- Use additional anchoring stakes to counteract the greater leverage generated during jumps.
- Encourage the rider to wear full‑face helmets, knee pads, elbow pads, and gloves, as the increased height raises impact potential.
Because the ramp assembles without tools, it can be stored compactly when not in use, preserving yard space for other activities.
Tips & Pro Tips
- Inspect all ramp surfaces weekly for cracks or loose fittings; replace damaged components promptly.
- Apply a thin layer of outdoor silicone sealant to the rubber feet if they lose grip after prolonged exposure to moisture.
- Use garden mulch or rubber matting around the landing zones to cushion accidental falls.
- Schedule practice sessions during dry weather; wet surfaces reduce traction and increase slip risk.
- Encourage riders to start with low‑speed approaches and gradually increase velocity as confidence builds.
Troubleshooting
| Problem | Possible Cause | Solution |
|---|---|---|
| Ramp slides during use | Insufficient anchoring or uneven ground | Re‑position stakes deeper, add sandbags, or place a plywood base for level support. |
| Rider feels unstable on launch | Surface is dirty or wet | Clean the ramp with a damp cloth and allow it to dry fully before use. |
| Excessive wobble on tabletop | Loose mounting screws | Tighten all screws using a screwdriver; replace any stripped hardware. |
Conclusion
By following this guide, one can construct a versatile backyard scooter skill course that promotes physical activity, coordination, and confidence. The recommended ramps provide reliable performance, easy assembly, and safety features that protect young riders. As children progress, the modular design allows the course to evolve, ensuring continued engagement. Parents are encouraged to monitor usage, enforce safety gear, and enjoy the satisfaction of watching their children master new tricks in a controlled environment.
Products Mentioned in This Guide
Frequently Asked Questions
What size area is needed to build a backyard scooter skill course?
A flat space of at least 10 × 15 feet works well, but you can scale the layout to fit any yard as long as there’s room for ramps and a safe landing zone.
How do I choose the right ramp height for kids?
Start with ramps no higher than 12‑18 inches for beginners and increase height gradually as the child’s skill and confidence improve.
What safety gear is essential for young scooter riders?
Helmet, knee pads, elbow pads, and gloves are must‑haves to protect against falls and bruises.
Can I secure ramps without permanent installation?
Yes—use ground‑level anchoring stakes or sandbags to keep ramps stable while allowing easy removal or repositioning.
How often should I inspect the course for wear and safety?
Check the ramps, bolts, and safety gear before each use and replace any worn or damaged parts immediately.