How to Assemble a Folding Scooter Emergency Roadside Repair Kit: Complete Checklist & Quick-Fix Guide
Introduction
Every folding scooter rider knows that a sudden flat tire or a loose brake can ruin a commute. This guide explains how to create a lightweight, comprehensive emergency kit that fits in a backpack or under the seat. Readers will learn which tools are essential, how to organize them, and why each recommended product improves reliability. By the end, one will be prepared to handle common roadside issues without missing a beat.
What You’ll Need
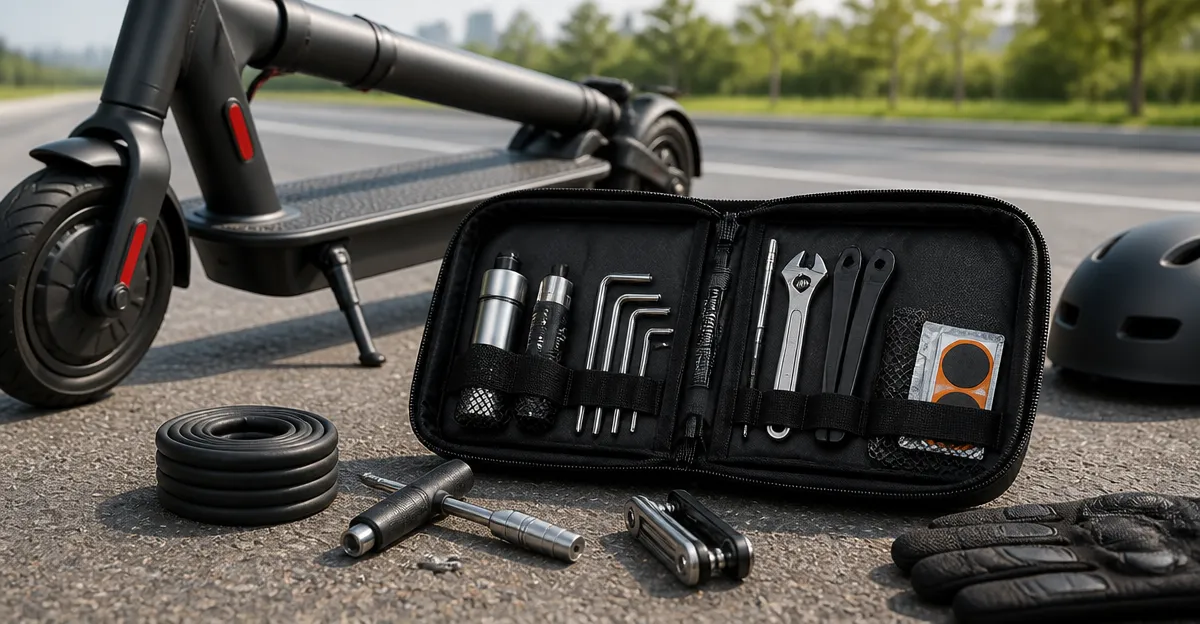
- Portable air pump and multi‑tool set
- Tire patch kits (rubber and pre‑glued)
- Lightweight storage bag or pouch
- Basic cleaning supplies (rubbing alcohol wipes)
- Optional: spare valve cores and a small screwdriver
All of the items below are available on Amazon and have been selected for their price, rating, and compact design.
Step 1: Identify the Most Common Scooter Failures
The first step in building an effective kit is to understand the problems that occur most frequently. Flat or punctured tires are the top complaint, followed by loose bolts on the handlebar or brake levers. Additionally, riders may encounter a slipped chain on hybrid models or a broken headset bearing. Recognizing these scenarios allows you to select tools that directly address each issue, reducing the time spent on the roadside.
When a tire loses pressure, the rider must either inflate it or patch a puncture. For this reason, a reliable pump and a set of patches are indispensable. If the scooter uses a pneumatic tire with a Schrader valve, a pump that supports both Schrader and Presta valves provides flexibility for future bike or scooter upgrades.
Step 2: Choose a Compact Pump and Multi‑Tool
One of the most efficient ways to cover both inflation and minor adjustments is to select a kit that combines a mini pump with a multi‑tool. The PXZBLG Bike Repair Kit includes a dual‑valve mini pump, a 16‑in‑1 multitool, Allen wrenches, tire levers, and a durable carry bag. At $9.99, it offers a rating of 4.4 stars from 467 reviews, indicating consistent satisfaction among cyclists and scooter owners alike.
The pump’s ability to handle both Schrader and Presta valves ensures compatibility with most folding scooters that use standard air valves. The multitool’s Allen wrenches (4 mm and 5 mm) match the common bolt sizes on scooter stems and brake calipers, allowing quick tightening without a separate screwdriver. The included bag can be clipped to the scooter frame, keeping the kit accessible without adding noticeable weight.
For riders who prefer a dedicated metal tool, the WOTOW 16-in-1 Bike Tool Kit provides chrome‑vanadium steel construction and an extended set of hex keys ranging from 2 mm to 6 mm. Priced at $8.99 with a 4.5‑star rating from 14,562 reviews, this kit is slightly heavier but offers additional socket wrenches and a screwdriver, which can be valuable for adjusting brake cables or tightening a loose deck bolt.
Choosing between these two options depends on personal preference: the PXZBLG kit excels in portability and integrated pump, while the WOTOW kit offers a broader range of tools for more complex adjustments.
Step 3: Add Reliable Tire Patch Solutions
Even with a functional pump, a puncture may require a patch to restore airtightness. Two complementary patch systems are recommended: a traditional glue‑based kit and a pre‑glued, mess‑free option.
The Slime Tube Patch Kit contains five rubber patches, a metal scuffer, and a tube of rubber cement for a total of seven pieces. At $3.34 and a 4.4‑star rating from over 9,000 reviews, it is an economical choice for riders who are comfortable applying glue and allowing it to cure. The metal scuffer prepares the tube surface, ensuring the patch adheres securely.
For a faster, glue‑free experience, the Slime Pre‑Glued Bike Patch Kit offers six peel‑and‑stick patches and a scuffer. Priced at $5.44 with a 4‑star rating from 4,452 reviews, it eliminates mess and reduces repair time to under two minutes. Users report that cleaning the area with rubbing alcohol before scuffing improves adhesion, a tip that will be revisited in the Pro Tips section.
For riders who want a large inventory of patches for multiple rides, the Bike Tire Repair Kit, 80pcs supplies 66 patches (square and round), two tire levers, valve cores, glue, and a compact storage box. Although priced at $14.99, its 4.5‑star rating from 295 reviews reflects high value for long‑distance commuters who may face several punctures before reaching a repair shop.
By combining one glue‑based kit (Slime Tube Patch Kit) with a pre‑glued kit (Slime Pre‑Glued Bike Patch Kit) and a bulk patch supply (Bike Tire Repair Kit, 80pcs), the rider gains flexibility for quick fixes and more durable, long‑term repairs.
Step 4: Organize the Kit for Maximum Portability
After selecting the tools, the next step is to arrange them in a way that minimizes bulk while keeping each item reachable. The carry bag included in the PXZBLG Bike Repair Kit is designed with multiple compartments, allowing separation of the pump, multitool, and patches. Place the pump in the main compartment, the multitool in a side pocket, and the patch kits in the front zippered pocket.
If the rider prefers a separate pouch, the compact dimensions of the WOTOW tool kit (3.5 × 1.8 × 1.1 in) enable it to fit inside a standard saddlebag or a small backpack. Add the 80‑piece patch box, which weighs only 0.4 lb, to the same bag; its slim profile ensures the overall kit remains under 1 lb.
Secure the bag to the scooter using a zip‑tie or the built‑in straps on the PXZBLG bag. Position it on the handlebar stem or under the seat rail where it does not interfere with folding mechanisms. Regularly check that the straps remain tight to avoid rattling during rides.
Label each compartment with a small waterproof marker so that, under stress, the rider can locate the required tool without hesitation.
Step 5: Test the Kit and Perform Routine Maintenance
Before relying on the kit in an emergency, conduct a mock repair at home. Inflate a tire using the mini pump, then deliberately create a small puncture to practice applying a patch from both the glue‑based and pre‑glued kits. Verify that the pump reaches the recommended pressure (typically 40–60 psi for folding scooters) and that the multitool fits the scooter’s bolts without stripping.
Schedule a monthly check of the kit: ensure the pump’s barrel is free of debris, the patch adhesives are not dried out, and the tool hinges move smoothly. Replace any worn patches or damaged levers promptly. Maintaining the kit prevents the surprise of a missing component when a real flat occurs.
Finally, keep a small bottle of rubbing alcohol and a lint‑free cloth in the bag. These items are essential for cleaning the tube surface before applying a pre‑glued patch, a step that dramatically improves patch longevity.
Tips & Pro Tips
- Carry a spare valve core. Many scooters use removable valve cores; a spare prevents a flat that cannot be inflated.
- Use the scuffer before any patch. Lightly roughening the tube surface creates a better bond for both glue‑based and pre‑glued patches.
- Practice the “sandwich” technique. After applying a pre‑glued patch, place a small piece of rubber (such as a tire lever) over the patch and inflate the tire slightly. This pressure holds the patch in place while the adhesive cures.
- Store the pump upright. Keeping the mini pump vertical reduces the chance of internal seals drying out.
- Check tire pressure weekly. Maintaining proper pressure reduces the likelihood of punctures and extends tire life.
Troubleshooting Common Issues
| Problem | Possible Cause | Solution |
|---|---|---|
| Pump fails to inflate | Seal is dried out or valve head is blocked | Clean the valve head with a cloth, re‑seal the pump, or replace the pump if damage persists. |
| Patch does not adhere | Surface not cleaned or scuffed properly | Use rubbing alcohol wipes, scuff with the metal scuffer, let the area dry, then apply the patch. |
| Tool slips on bolt | Incorrect Allen size or worn tool tip | Confirm bolt size with the WOTOW kit’s range; replace worn tools. |
Conclusion
Assembling a folding scooter emergency roadside repair kit equips riders with the confidence to tackle flats, loose bolts, and minor mechanical failures on the go. By selecting a compact pump and multitool, pairing both glue‑based and pre‑glued patch kits, and organizing everything in a lightweight bag, one creates a reliable solution that fits under any seat. Regular testing and maintenance ensure the kit remains ready for unexpected rides, turning potential setbacks into manageable tasks.
With the tools and procedures outlined in this guide, any scooter enthusiast can ride farther, knowing that a quick fix is always within reach.
Products Mentioned in This Guide
Frequently Asked Questions
What essential items should be included in a folding scooter emergency repair kit?
Include a portable air pump, multi‑tool set, tire patch kits (rubber and pre‑glued), a lightweight storage pouch, and cleaning wipes; spare valve cores and a small screwdriver are optional.
How do I organize the kit so it fits in a backpack or under the scooter seat?
Use a compact, zippered pouch with dedicated compartments for the pump, patches, and tools, and place the heaviest items at the bottom for stability.
Can I repair a flat tire on the road without removing the wheel?
Yes, a portable pump and pre‑glued patch kit allow you to seal most punctures without taking the wheel off, provided the damage is small.
Why is a multi‑tool set preferred over individual tools for scooter repairs?
A multi‑tool combines a screwdriver, Allen keys, and a tire lever in one lightweight device, reducing bulk while covering most common adjustments.
How often should I check and replace the valve core in my scooter tires?
Inspect the valve core before each ride and replace it if you notice leaks or difficulty inflating; keeping a spare valve core in the kit ensures quick fixes.